Showing posts with label Mod Podge. Show all posts

15 February 2011

SU! Brights Patterned Hearts Wreath

So, a few weeks ago I mentioned a wreath I was planning to make with Stampin' Up's Designer Series Paper Patterns Stack - Brights Collection.  I finally got it done, and then finally got the pics taken and uploaded (iPhoto isn't working, so I'm learning to use Picasa.  I figured out how to crop photos! Whoo-hoo!!!!) So, here it is!

The hearts themselves are just a light cardboard from a calendar or something, and I Mod Podged the papers to the shapes, before hot gluing the whole mess to a wire wreath form from Michaels (and hey!  I didn't burn myself once!  go me!!)

The butterflies were punched out of the basic Brights cardstock with the SU! Butterfly punch.

I made sure to include at least one heart in every color, and in both patterns (the paper is 2-sided; very cool...)


The wee little accents in the center of each butterfly were punched from the patterned scraps left over, using the flower punch from the SU! Punch Pack set.


So there it is! Hope you like it!


16 January 2011

Wowzers! How cool is this?

So, I've always been a writer.  I've written in journals my entire life... sometimes hard-bound books, sometimes a word file, and sometimes just bits of notebook paper here and there.  At the same time, I've always envied people who could be artistic in their journals.  I always thought it was just beyond me.

That is, until this past week.  See, this week, I started the Brave Girls Club Soul Restoration online course.  I joined Brave Girls Club back in August or September, and really enjoyed reading the blog posts and whatnot, then I found out about Brave Girls Camp, and was lusting to go (can't afford it anytime soon.  But I hope one day...)  Anyhoo, they decided to do an online course for gals like me, who can't afford to attend the Camp.

Okay, back to my main point... So, Melody, one of the founders of Brave Girls Club and a rather brilliant artist, posted pics of one of her journals in a blog she did ages ago (I can't seem to find it...), and I remember looking at those pics and once again thinking, "man, I wish I was that talented..." Cuz, see, I'm crafty, and I can make cards, and could probably scrapbook if I really wanted to, and I have a craft stash that is just terrifyingly out of control... But I'm not "artsy"... or at least, I didn't think I was... But this past week, looking at videos that Melody posted int he class for us, and making a determined effort to go outside my comfort zone, I've actually managed to create one of those journals that I've always been so envious of.  It' still not totally where 'd like it to be, talent-wise, but I'm likin' it.... I'm not going to post pics of this one, because quite frankly it is a bit personal, but as I start work on a more general art journal, I will post pics and share the ideas that I have. 

Although, there is one tip I want to share now, and yes, I got this from Melody--credit cards rock.  And not for spending money and jacking up your credit, either... they make a PHENOMENAL paint spreader! You want lots of color on your page but you don't want to saturate the page with paint and wait hours for it to dry?  Squeeze some paint on the page, grab your credit card or equivalent thingy (I'm actually using old student IDs from my college days) and spread away! Works great!!!!! And then you just need to find a decent pen to write on it with.  On my black pages, I used a Sharpie silver paint pen.  On the rest of them, just a Pilot Precise.  Seems to work fairly well!  Although, I am going to go invest in a few good waterproof journaling pens.  Need to get to Michaels anyway.  About to run out of Mod Podge!  Horrors!!!!

Oh, and glittery nail polish works great for an embellishment! lol!

So, I'm going to get back to my journaling, and then to bed.  After all, it is a wee bit late.... Stay well!

28 September 2010

I am just plum tickled with myself!

Okay, so I got to rummaging the other day, and I found a cross-stitch that my mom did for me when I turned 21.  Very cute, it's hanging in my craft room now.  But, it was in this large, flat gold box.  Like this:
Not a terribly pretty box...


So, I decided to take this box and do something with it. Partly because I want new wall art, and partly to see if I could.  And because I love some of the pieces my friend Jessie over at Points for Creativity has been doing with various surfaces, scrap-booking papers, and Mod Podge. I painted the box black (I have some of Plaid's FolkArt pigment paints.  Man is that stuff thick!  Perfect for a thing like this...) and started selecting papers.  Then I remembered the 1001 copies of Macbeth I own... Okay, not really that many, but I have 4 or 5, at least. Because I am an English teacher, and we do things like that. So, as we're nearing the Halloween-ie season, which always makes me think oddly enough of the Macbeth witches, because they are the quintessential Halloween witch / hag. Plus, I've recently discovered I can draw a rather rudimentary bird, so I decided to use those, too!

And, at Dollar Tree last week, I found these rather hideous shadow-box frames that proclaimed, loudly and often "It's a Boy." So, of course, I had to do something with those. Here's the original, sort of:
Gotta love the Dollar Tree!
Hideous, yes? Anyways, I sanded those down, and painted them black, as well.

So, after the paint finally dried (I hate waiting for paint to dry.  and glue... anything that must dry, really...) I pulled out the old Macbeth and ripped out all the witchy pages (well, except for the ones I had written on while I read the play for class.  yeah, it was that copy...) Then, I sketched out a biggish bird, and Mod Podged the opening scene onto him. Here he is drying:
After I arranged the scrapbook papers to my liking, I took a pic to remember:
Rough draft!
Then I pulled out the Mod Podge!  Cuz, you know, Mod Podge really does rock! Note to self--vellum does not like Mod Podge at all.  It was all sorts of bubbly, and there was NOTHING my brand new brayer (yay! I finally got a brayer!!!) could do to fix it. So I switched out the other vellum pieces I'd been planning on using.  Then, of course, it had to dry!  Joy!

Then I remembered the little frames!  And I thought they would look awfully nice with something to go with the big piece.  So I rummaged in my papers again, and found a few more to match the big piece, cut out two smaller birds, and Mod Podged more bits of the play on them. Once they all dried, I put everything together!

So here's the finished project:
The finished gathering

This is the Hecate scene

The witches are telling Banquo his future.  Poor guy.  Pretty sure it gets him killed...

Just another view

Those two pages of text are the "Double, double, toil and trouble" scene.  One of my favorites.  They add all sorts of unsavory things to the brew!!

The title bird!  
So there it is!  This past weekend's project!

RLW

18 September 2010

Lazy-Crafty Saturday Meanderings

So, I didn't do much today.  Okay, I take that back--I got most of that pesky prep work done for the class I have that starts Monday.  So, you know, there's that.  And I requested an invitation to Meylah.com, which I received, so I'll have that to work on, too.  And I made 4 more punkin tealights.  And I worked on the planning stages of a necklace for an action figure that a friend requested (she makes them--so cool!) And I planned the colors for the 5 African Helix bracelets I've had ordered.

But for some reason, I don't feel like I did much.  Maybe because it was mostly enjoyable, and I didn't feel too much pressure and when I tired of one thing I moved on to another?  Maybe.

Anyway, here are some pics of the very few things I took pics of (I'm really liking the photo-blogging idea.  Now I just need to get some easy-to-use photo-editing software... iPhoto is a bit odd to me in that way...)

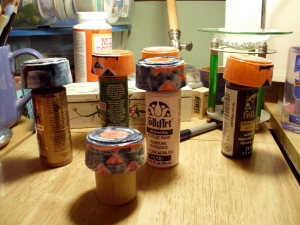
[caption id="attachment_243" align="aligncenter" width="300" caption="it's the FolkArt forest of drying punkins..."][/caption]

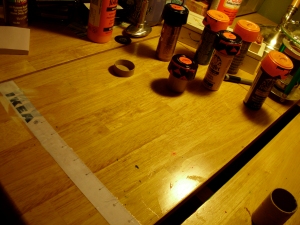
Oh, one other nifty thing I did.  You know those measuring tapes they have at Ikea?  The paper ones they give you 'cuz no one ever thinks to bring an actual tape measure to the store?  Well, yeah, last time I was there I stole a handful.  So I could do this:

[caption id="attachment_244" align="aligncenter" width="300" caption="theft! for a good crafty cause..."][/caption]

[caption id="attachment_245" align="aligncenter" width="300" caption="I podged it on the table...."][/caption]

[caption id="attachment_247" align="aligncenter" width="300" caption="And there's the forest of dryin' punkins in the background..."][/caption]

Cool, huh!

Hope you have a great Sunday!

RLW

12 September 2010

Super Crafty Fun Weekend!!!!

Yup, I had a super-crafty-fun-weekend! and it was grrrrrreeeeeeeeaaaaat!!!!! (insert Tony-the-Tiger voice here...)

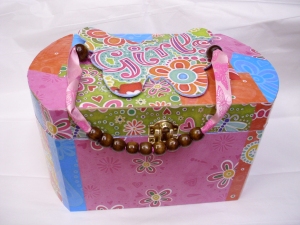
Okay, so, first, I decoupaged a box that that I'm using as a jewelry box for the pieces I want to sell (you know, rather than the cardboard box I had them in).  I even put a little handle on it and mirror inside it! It's really cute.  Here it is:

[caption id="attachment_200" align="aligncenter" width="300" caption="All finished!"]
[/caption]

Now, of course, getting to this point, what with the Mod Podge and the cutting and the mess (you should see my sweat pants--covered in modgy fingerprints.  Oh yeah--and I used paint, too!) was quite a bit of chaotic fun!

I started with all my shtuff...

[caption id="attachment_193" align="aligncenter" width="300" caption="Like how I laid it all out so nicely for a pic? :)"][/caption]

And then, of course, about half-way through, I realized I needed more shtuff. No pics of that, though... So then I got to painting the inside.  Also, no pics.  There was far too much mess going on to pick up the camera. I'm gonna wait a few more months before I get paint on it.

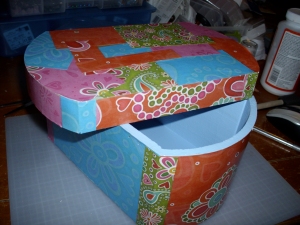
And then I had to measure.  Well, sort of.  I did measure the sides so I wouldn't waste too much paper, cause it was all pretty and stuff! But of course, I only measured the one time, and so my measurements aren't all spot on. My father would be so disappointed (he's a pro at the measuring thing...) But in the end, I did find a use for most of those left-over paper bits I did end up with (more on that in another post. Tomorrow, maybe...)  So, after all the measuring and the cutting and the modgin' and the podgin' was done, I ended up with this:

[caption id="attachment_195" align="aligncenter" width="300" caption="kinda cool, if I do say so myself...."][/caption]

So then, for the finishing touches.  I really wanted a handle on it, and I had visions of a suitcase like handle, but I have no spare suitcases, so I had to improvise something else.  I also wanted it to have a bit more interest goin' on up top there, and I have these large chip-board butterflies.  I have no clue where they came from, but they've been in my stash for awhile. So I took some of that paper and 'podged it up, and painted the ugly cardboard sides.  While I was at it, I took a length of pink ribbon and raided my bead stash for some large hole beads.  I found some great wooden ones, and strung those on the ribbon.  Then, to the toolbox I wandered!  With the help of my trusty staple gun, I attached the ribbon, and then used my E-6000 epoxy to attach the butterfly on top.  And wah-lah! A handle and some interest!!!

[caption id="attachment_196" align="aligncenter" width="300" caption="gotta love E-6000!!!!!!!"][/caption]

As the glue dried, I was pondering the inside.  Okay, truth be told, the glue wasn't so much dried as still very glue-y when I thought "Hey, a mirror would be cool!"  And it just so happens, I had a perfect mirror to use!  Back to the E-6000, slapped some dollops on the back of the mirror, press it into the inside top, prop it open, and then a few minutes later, discover that the glue from the butterfly is now dripping onto the coffee table.  Oops!!!  So I flipped the whole mess upside-down! Eventually, it dried.  well, the butterfly bit did.  I discovered the next day, after I closed the  lid for a few minutes, that the mirror bit was still oozing.  So, back open it went!  Finally, that all dried.

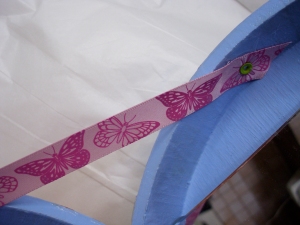
Then, I realized, there's no easy way to see yourself in the mirror if you're playing with jewelry, since it just flipped all the way open... so, I had to add some catcher-thingies... I'm sure they have an actual name, but I know not what it is.  Anyway, I used more ribbon, E-6000, and eyelets.  And let me say, I need a punch that will punch a hole in ribbon... that was not fun... and in retrospect, this part should get done BEFORE the mirror goes in... But I made it work:

[caption id="attachment_197" align="aligncenter" width="300" caption="Just hammer those eyelets in there! And use the E-6000 to make sure they stay!"][/caption]

And that was it!  Here's some more close up shots, after the fact:


[caption id="attachment_202" align="aligncenter" width="300" caption="And finally, filled with stuff!"][/caption]

You know, I'm really tempted to make another one to use as a purse. It's too cute!! And more on the rest of my crafty weekend soon!

RLW

09 September 2010

Mini Patchworked Table

OMG! I had so much fun with this!!!!!  Okay, a few days ago, I saw this dresser over at Mod Podge Rocks! blog. And, once I saw it, there was nothing for it but to spruce up the dull little table that holds my desk spill overs... Here's the original:

[caption id="attachment_157" align="aligncenter" width="225" caption="poor, old, tired table..."][/caption]

Poor thing.  All beaten and battered. My mom found it years ago at a garage sale, so it has been truly used and abused. It really did deserve a make-over, don't you think?

So, first order of business, find all the supplies!  So up the stairs I went to the craft room, and armed myself with a mostly full jar of Mod Podge, some brushes (and the one lone sponge brush I could find) the FolkArt beige paint, the Dollar Tree Scrapbook paper (I love Dollar Tree Scrapbook paper... it's pretty good quality, and you get a little pack of coordinating sheets for a buck!  awesome!!!!!), and my paper cutter.  Cuz, you know, gotta have straight lines here.... Back down the stairs I traipsed, and got ready to 'podge!!!!

But, first I had to paint... not my favoritest thing, but I did have fun.  Although, I think I may have needed a bigger spongy-brush:

[caption id="attachment_160" align="aligncenter" width="300" caption="hmmm... an awful lot of area still to cover there...."][/caption]

But I eventually got it all covered, and covered well!

[caption id="attachment_161" align="aligncenter" width="225" caption="okay, yeah, still have to do that bottom section here...."][/caption]

So once the painting was done, it had to dry.  What to do when the paint is drying... Why not read a post over at Brave Girls blog? So I did:

[caption id="attachment_176" align="aligncenter" width="225" caption="Yeah, totally got the idea to document what I was doing while paint dried from the Brave Girl blog post I was reading while the paint dried... and watching some Netflix... :)"][/caption]

Finally, the paint dried.  Now to have fun with paper!!!  I love cutting up paper.  Well, I should, I make cards, and LOVE IT!!!!!! For the top of the table I just cut random-sized squares; I think the biggest was a 6-inch square, while the smallest was a 1-inch square. I think I also tossed in a couple of rectangles just to mix it up a bit.  Then, I arranged them in a pleasing manner, grabbed the 'podge, and went to town!  Man, did I make a mess.  But it was fun!  And in the end, very pretty (and can I just say, again, I soooooo need a brayer... bubbly bits all over the place!!!!) So here's the top:


[caption id="attachment_163" align="aligncenter" width="300" caption="not quite dry yet... oh, boy, more waiting!!!"][/caption]

Once I had that done, I turned my attention to the drawer:


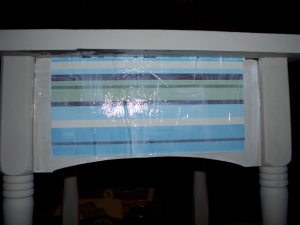
[caption id="attachment_164" align="aligncenter" width="300" caption="stripeys!!!"][/caption]

And then I had to ponder the sides:


[caption id="attachment_167" align="aligncenter" width="300" caption="left"][/caption]

[caption id="attachment_168" align="aligncenter" width="300" caption="back"][/caption]

[caption id="attachment_169" align="aligncenter" width="300" caption="right (and oops on using the same pattern as the front...)"][/caption]

And the bottom shelf!  Basically, that was a repeat of the top, but with smaller pieces of paper:

[caption id="attachment_170" align="aligncenter" width="300" caption="and again, not quite dry! I'm an impatient photographer..."][/caption]

And then finally, it was dry and ready for a coat or two or acrylic sealer (okay, yeah, maybe I should do more, but the can is empty now.  AND!!!!! I'm down to half a jar of Mod Podge!!! yikes!!!!)

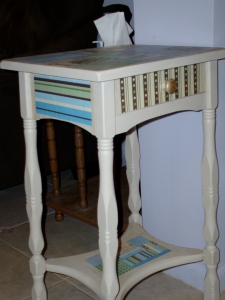
So here it is, all done and pretty:

[caption id="attachment_171" align="aligncenter" width="225" caption="The distance view"][/caption]

[caption id="attachment_172" align="aligncenter" width="300" caption="The drawer and knob"][/caption]

[caption id="attachment_174" align="aligncenter" width="300" caption="Pretty!!"][/caption]

So yeah, I am just totally tickled with myself!  I had fun!!!

RLW

07 September 2010

iPhone Case, Take 2 (or, fixing 'when decoupage goes wrong...")

So, a few weeks ago, as ya'll know, I decided to decoupage my iPhone cover.  Quite frankly, it didn't turn out so well (very cute, but not terribly functional, and I had to have my boyfriend of the crazy-strong-hands to get it off the phone... oops...) Here's a pic:

[caption id="attachment_135" align="aligncenter" width="300" caption="oopsy..."][/caption]

So, over the weekend, after crazy-strong-hand-boy took it apart, I had great fun ripping off the multiple layers of tissue paper and Mod Podge... really, it was almost more fun than putting it on the first time!

Anyway, here's the original case: You can see why I wanted to play with it... I mean, look at it... it's just so, so, dull.... so... not fun!!!!

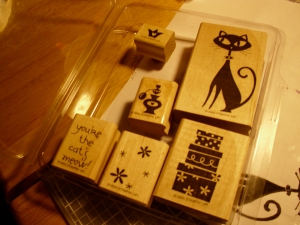
So, anywho, over the weekend, I got all the stuff pulled off, and pondered what I wanted to do next... I'm a huge fan of Stampin' up!, and have this stamp set:

[caption id="attachment_151" align="aligncenter" width="300" caption="The Cat's Meow Stamp set"][/caption]

Isn't she freakin' cute!?!  I love her (I actually used her in a Christmas card a few years ago...) She's just so regal and catty... She's awesome... (unfortunately, I don't think she's offered anymore.  very sad...)

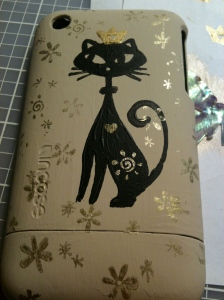
Okay, back to the project.  I painted the case a rather bland shade of beige (it's a FolkArt paint from Plaid that I, for some reason, have a very large bottle of. I never buy the large bottle! But thank goodness I did that time, as I've been using it nonstop this week!) Once I had the case covered fairly well (2 coats, I think) I experiment on a sheet of printer paper for the best way to stamp Ms. Kitty up there.  After some trial and error (and discovering that my black stamp pad--also from Stampin' Up!--is now purple... odd... Of course, I think I've had it for about 6 years...) I decided the best way to do this would be with paint.  So then I had to practice with the paint and the stamp (can I just say, I sooooooo need a brayer...) I finally got it all worked out, got the stamp all painted up, and very carefully pressed the phone case onto the stamp.  See, I figured the best way to not smear it would be to just leave the stamp stationary, especially since I was going to have to press, and the phone case is, without the phone, essentially hollow... and it worked! (yeah, I was all ready to repaint the whole mess... but I didn't have to! woot!!!)

So, after I had Ms. Kitty there, I just felt it needed something more. A few years ago I bought a gold Martha Stewart stamp pad, so I used that and some small stamps (including the flowers in the cat's meow set) to accent the cover.

[caption id="attachment_146" align="aligncenter" width="225" caption="The rough draft... (pre-podging...)"][/caption]

I tried to be all fancy on the cat, too.  Didn't work out so well in the end.  So, yeah, note to self, Martha Stewart Stamp pads, while cool, do not stand up well to sealer! (I added some gold paint to kind of antique the whole thing.)  So, you know, oops! I also added some gold paint for the collar, with little sparkling pink bits (I mixed red and silver paint) on that and the crown (there's a heart cut-out on the crown, so I painted it in.) After the Mod Podge coat, I sprayed the whole mess with acrylic sealer and let it hang out for 2 days.  Here's the finished project:

[caption id="attachment_147" align="aligncenter" width="300" caption="on my newly 'podged table! LOL! (more on that soon)"][/caption]

And another pic: And some detail from the front:

[caption id="attachment_150" align="aligncenter" width="300" caption="The detail of the front edge--I painted it an antique gold..."][/caption]

Now, unfortunately, I think this one is now stuck on the phone, too.  But at least I like it better!  And so far, no weird crackly-but-not bits!

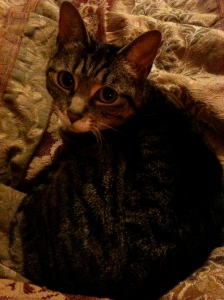
Oh, and here's the real Ms. Kitty (aka, Buttercup...)

[caption id="attachment_152" align="aligncenter" width="225" caption="Da Buttah-bee.... "][/caption]

She's not been pleased with Mama lately--I keep locking her out of the craft room while I 'podge. The last thing I need is cat hair in the mix!  (oddly, her brother doesn't seem to care much... go figure...)

Thanks for reading!

RLW