Showing posts with label Dollar Tree. Show all posts

28 September 2010

I am just plum tickled with myself!

Okay, so I got to rummaging the other day, and I found a cross-stitch that my mom did for me when I turned 21.  Very cute, it's hanging in my craft room now.  But, it was in this large, flat gold box.  Like this:
Not a terribly pretty box...


So, I decided to take this box and do something with it. Partly because I want new wall art, and partly to see if I could.  And because I love some of the pieces my friend Jessie over at Points for Creativity has been doing with various surfaces, scrap-booking papers, and Mod Podge. I painted the box black (I have some of Plaid's FolkArt pigment paints.  Man is that stuff thick!  Perfect for a thing like this...) and started selecting papers.  Then I remembered the 1001 copies of Macbeth I own... Okay, not really that many, but I have 4 or 5, at least. Because I am an English teacher, and we do things like that. So, as we're nearing the Halloween-ie season, which always makes me think oddly enough of the Macbeth witches, because they are the quintessential Halloween witch / hag. Plus, I've recently discovered I can draw a rather rudimentary bird, so I decided to use those, too!

And, at Dollar Tree last week, I found these rather hideous shadow-box frames that proclaimed, loudly and often "It's a Boy." So, of course, I had to do something with those. Here's the original, sort of:
Gotta love the Dollar Tree!
Hideous, yes? Anyways, I sanded those down, and painted them black, as well.

So, after the paint finally dried (I hate waiting for paint to dry.  and glue... anything that must dry, really...) I pulled out the old Macbeth and ripped out all the witchy pages (well, except for the ones I had written on while I read the play for class.  yeah, it was that copy...) Then, I sketched out a biggish bird, and Mod Podged the opening scene onto him. Here he is drying:
After I arranged the scrapbook papers to my liking, I took a pic to remember:
Rough draft!
Then I pulled out the Mod Podge!  Cuz, you know, Mod Podge really does rock! Note to self--vellum does not like Mod Podge at all.  It was all sorts of bubbly, and there was NOTHING my brand new brayer (yay! I finally got a brayer!!!) could do to fix it. So I switched out the other vellum pieces I'd been planning on using.  Then, of course, it had to dry!  Joy!

Then I remembered the little frames!  And I thought they would look awfully nice with something to go with the big piece.  So I rummaged in my papers again, and found a few more to match the big piece, cut out two smaller birds, and Mod Podged more bits of the play on them. Once they all dried, I put everything together!

So here's the finished project:
The finished gathering

This is the Hecate scene

The witches are telling Banquo his future.  Poor guy.  Pretty sure it gets him killed...

Just another view

Those two pages of text are the "Double, double, toil and trouble" scene.  One of my favorites.  They add all sorts of unsavory things to the brew!!

The title bird!  
So there it is!  This past weekend's project!

RLW

25 September 2010

Dollar Tree... the untapped crafty resource

Seriously, it is... I cannot tell you how many things I have found at the Dollar Tree that have, eventually, made their way into a craft of some kind (including a pair of earrings that I have gotten more compliments on!  Pics in a minute...)

I've bought scrapbooking papers there, jewelry findings, stickers, weird knicky-knacks, frames, flowers, clear pumpkins (one of the latest purchases!) I even found adhesive there once (okay, it wasn't great, and either the Stampin' Up! Adhesive or Glue Dots work WAAAAAAAAAYYY better, but it's perfect for testing stuff and then ripping it apart again!)

I've seen several discussions recently about craft stores and whatnot, and thought it was time someone came out and said it--sometimes the cheapest supplies help you create the niftiest things.  With that in mind, I thought it might be nice to post pics of some of the things I've made, and have gotten complements on, that I've used Dollar Tree supplies in.  Hope you like them!

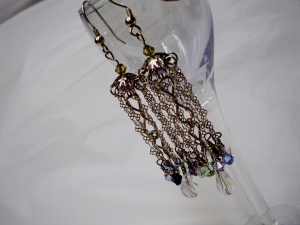
Okay, so ages ago, I decided I wanted some blingy earrings.  This is what I came up with:

[caption id="attachment_298" align="aligncenter" width="300" caption="The Carousel Earrings--made possible by the bead cap there, which came from Dollar Tree. The rest of it--sterling chain and swarovski crystals!"][/caption]

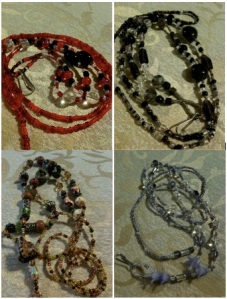
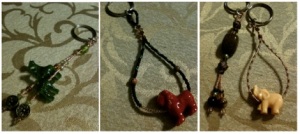
So, I found the end clips, where the card hangs, for these lanyards at the Dollar Tree, in a mix with key chain loops:

[caption id="attachment_83" align="aligncenter" width="227" caption="The hooks came from Dollar Tree, everything else from a craft / bead store."][/caption]

So I mentioned key chains? Yeah, here they are:

[caption id="attachment_82" align="aligncenter" width="300" caption="The key rings, and possibly the tiger tail, all from Dollar Tree..."][/caption]

And papers!  They have awesome scrapbooking papers (sometimes; admittedly it can be hit or miss). In fact, I've never used the more expensive papers I have, but I've used Dollar Tree papers in every major decoupaging project I've done:

[caption id="attachment_296" align="aligncenter" width="300" caption="the tea tray... The base was from Michaels, the papers are Dollar Tree..."][/caption]

[caption id="attachment_174" align="aligncenter" width="300" caption="All the papers used in this project came from the Dollar Tree..."][/caption]

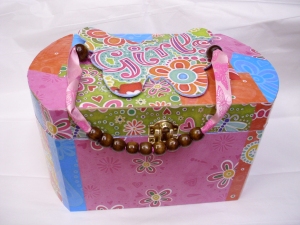
[caption id="attachment_200" align="aligncenter" width="300" caption="Again, the box came from Michaels, but all that beautiful bright paper came from the Dollar Tree... and maybe the ribbon, too... I can't remember... "][/caption]

So you see?  It's a wonderful resource!  If you haven't been, you should go wander. And don't feel discouraged if you don't find anything.  Maybe they're just having an off day! (and don't get me started on the storage possibilities for all your crafting stuff from the Dollar Tree...)

RLW

14 September 2010

Craftin' Cards!

So, after I decorated my cute lil' jewelry box the other day, I gathered up all my shtuff to take it back up to the craft room... which was, not to put too fine a point on it, an utter mess... In some respects it still is... But, I decided I could do something about the table, which is, after all, my main craft area. So I started gathering, and tossing things that had no use (bits of plastic string from beads mostly.  No fear--I kept all the good stuff!) and organizing the left-over beading stuff from the other stuff.  See, a few months ago, I felt it necessary to move all my jewelry making stuff down to the coffee table.  I was getting overwhelmed.  And there it has stayed since.  But, it has gotten used!!! So the craft room is now a bit more focused on mostly paper crafts and painting/Mod Podge projects.

As I gathered, I ran across lots of random bits of cardstock, mostly of the small-but-I-can't-throw-it-out-because-I-might-find-a-use-for-it-one-day variety.  So, I started organizing all my paper bits.  4 folders and one box later, I can actually find things. woo-hoo!!!! And in with the smallish bits, I found 13 pieces of card-ish sized cardstock.  So, there was nothing for it but that I play (although, I did finish organizing the table first--after all, gotta have a work space!)

Here's the newly organized table:

[caption id="attachment_222" align="aligncenter" width="491" caption="Imagine this as a huge heaping mess, and you'll have the before picture...."][/caption]

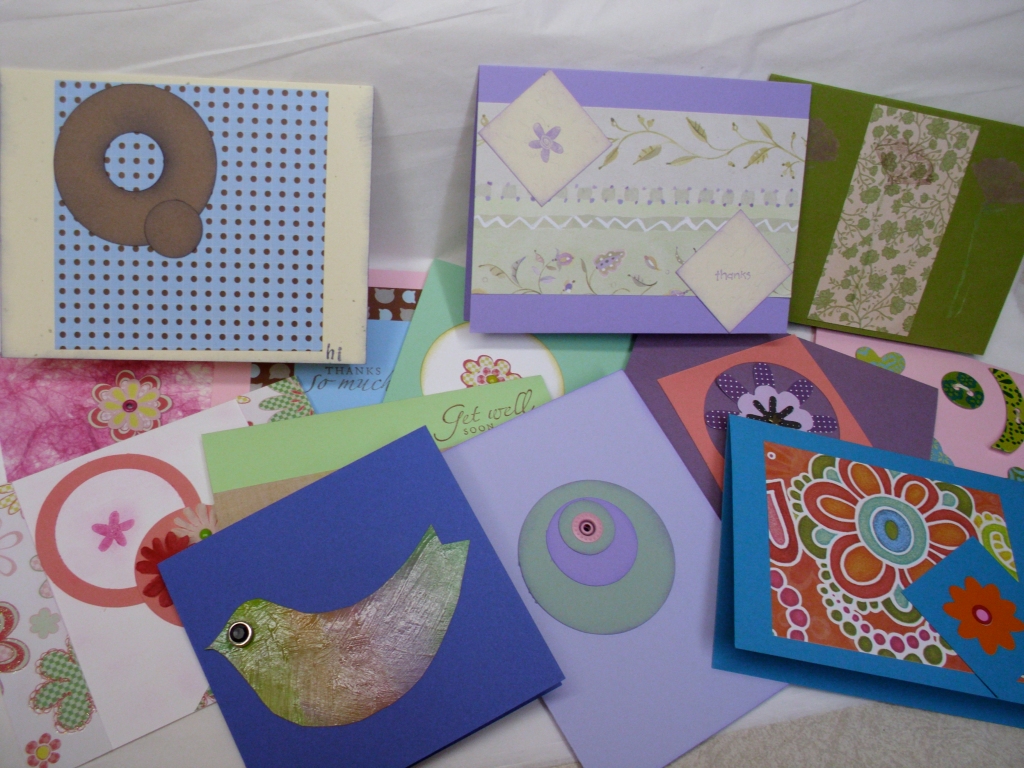
So after I cleaned it all up and found all my stamp pads and got organized again, I creased all the paper, made the cuts I needed to square things up, and set to work.  I actually set myself a little challenge--I would not, under any circumstances, touch another full-sized piece of paper.  The goal was to try to use up as much of the bitsy bits as possible (sad to say, I still have loads of them left...)  I am happy to report--I succeeded!!  13 cards in all, with varying degrees of difficulty, and using all manner of fun bits. I really had a blast with this, and I think I will definitely set myself another task like this in the future.

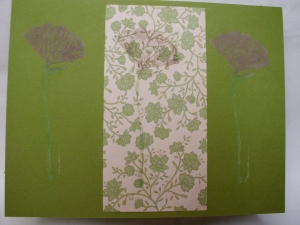
Here's a smallish list of what I used: mostly Stampin' Up! stamps (I primarily stuck to just one set of sayings I have); the plain cardstock was mainly Stampin' Up! as well, and all the patterned bits were things I've been gathering over the years, mostly from Michaels and the Dollar Tree (in fact, you'll recognize some from the patchwork table and the jewelry box I decorated over the past two weeks.)   Likewise, all my accent pieces are things I've been gathering, from all manner of craft store.  Oh, but I did make rat use of the Creative Memories circle cutter I got from my friend Sara (I love my friends who want to be crafty but just don't carry through--I get their stuff, usually! yay!!!) Oh, and I used Mod Podge on one!

Here are the pics:


[caption id="attachment_208" align="aligncenter" width="819" caption="the 'montage' shot!"][/caption]


This first one has the Mod Podge.  I actually based the bird on a pic I saw over at The Dabbling Mum, whom I found through Creating the Hive.


[caption id="attachment_210" align="aligncenter" width="300" caption="after I ink'd him & blend'd him, I m'podge'd him! "][/caption]

[caption id="attachment_209" align="alignleft" width="300" caption="girly! "][/caption]

[caption id="attachment_211" align="alignleft" width="300" caption="I love the colors!!!"][/caption]

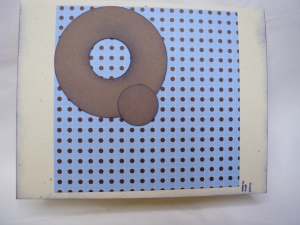
[caption id="attachment_212" align="alignleft" width="300" caption="hi..."][/caption]

[caption id="attachment_213" align="alignleft" width="300" caption="I maybe should have stopped while I was ahead with this one, but it's still cute!"][/caption]

[caption id="attachment_214" align="alignleft" width="300" caption="a pretty thanks!"][/caption]

[caption id="attachment_215" align="alignleft" width="300" caption="yeah, I had bit of purple floating around..."][/caption]

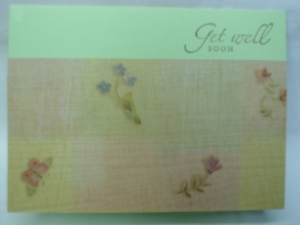
[caption id="attachment_217" align="alignleft" width="300" caption="You never know when you'll need a Get Well card..."][/caption]

[caption id="attachment_218" align="alignleft" width="300" caption="These are supplies mostly from a Card-making club I briefly joined..."][/caption]

[caption id="attachment_219" align="alignleft" width="300" caption="Friends Forever!"][/caption]

[caption id="attachment_220" align="alignleft" width="300" caption="I love the cat heads!"][/caption]

[caption id="attachment_221" align="alignleft" width="300" caption="Chipboard buttons! and Embroidery thread! woot!!!"][/caption]

[caption id="attachment_223" align="alignleft" width="225" caption="Circling..."][/caption]

09 September 2010

Mini Patchworked Table

OMG! I had so much fun with this!!!!!  Okay, a few days ago, I saw this dresser over at Mod Podge Rocks! blog. And, once I saw it, there was nothing for it but to spruce up the dull little table that holds my desk spill overs... Here's the original:

[caption id="attachment_157" align="aligncenter" width="225" caption="poor, old, tired table..."][/caption]

Poor thing.  All beaten and battered. My mom found it years ago at a garage sale, so it has been truly used and abused. It really did deserve a make-over, don't you think?

So, first order of business, find all the supplies!  So up the stairs I went to the craft room, and armed myself with a mostly full jar of Mod Podge, some brushes (and the one lone sponge brush I could find) the FolkArt beige paint, the Dollar Tree Scrapbook paper (I love Dollar Tree Scrapbook paper... it's pretty good quality, and you get a little pack of coordinating sheets for a buck!  awesome!!!!!), and my paper cutter.  Cuz, you know, gotta have straight lines here.... Back down the stairs I traipsed, and got ready to 'podge!!!!

But, first I had to paint... not my favoritest thing, but I did have fun.  Although, I think I may have needed a bigger spongy-brush:

[caption id="attachment_160" align="aligncenter" width="300" caption="hmmm... an awful lot of area still to cover there...."][/caption]

But I eventually got it all covered, and covered well!

[caption id="attachment_161" align="aligncenter" width="225" caption="okay, yeah, still have to do that bottom section here...."][/caption]

So once the painting was done, it had to dry.  What to do when the paint is drying... Why not read a post over at Brave Girls blog? So I did:

[caption id="attachment_176" align="aligncenter" width="225" caption="Yeah, totally got the idea to document what I was doing while paint dried from the Brave Girl blog post I was reading while the paint dried... and watching some Netflix... :)"][/caption]

Finally, the paint dried.  Now to have fun with paper!!!  I love cutting up paper.  Well, I should, I make cards, and LOVE IT!!!!!! For the top of the table I just cut random-sized squares; I think the biggest was a 6-inch square, while the smallest was a 1-inch square. I think I also tossed in a couple of rectangles just to mix it up a bit.  Then, I arranged them in a pleasing manner, grabbed the 'podge, and went to town!  Man, did I make a mess.  But it was fun!  And in the end, very pretty (and can I just say, again, I soooooo need a brayer... bubbly bits all over the place!!!!) So here's the top:


[caption id="attachment_163" align="aligncenter" width="300" caption="not quite dry yet... oh, boy, more waiting!!!"][/caption]

Once I had that done, I turned my attention to the drawer:


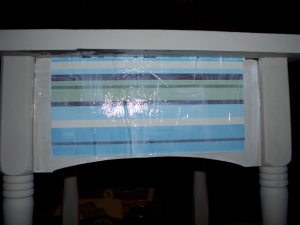
[caption id="attachment_164" align="aligncenter" width="300" caption="stripeys!!!"][/caption]

And then I had to ponder the sides:


[caption id="attachment_167" align="aligncenter" width="300" caption="left"][/caption]

[caption id="attachment_168" align="aligncenter" width="300" caption="back"][/caption]

[caption id="attachment_169" align="aligncenter" width="300" caption="right (and oops on using the same pattern as the front...)"][/caption]

And the bottom shelf!  Basically, that was a repeat of the top, but with smaller pieces of paper:

[caption id="attachment_170" align="aligncenter" width="300" caption="and again, not quite dry! I'm an impatient photographer..."][/caption]

And then finally, it was dry and ready for a coat or two or acrylic sealer (okay, yeah, maybe I should do more, but the can is empty now.  AND!!!!! I'm down to half a jar of Mod Podge!!! yikes!!!!)

So here it is, all done and pretty:

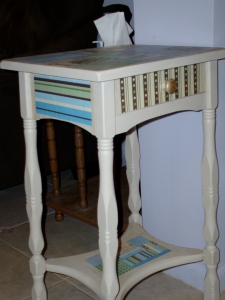
[caption id="attachment_171" align="aligncenter" width="225" caption="The distance view"][/caption]

[caption id="attachment_172" align="aligncenter" width="300" caption="The drawer and knob"][/caption]

[caption id="attachment_174" align="aligncenter" width="300" caption="Pretty!!"][/caption]

So yeah, I am just totally tickled with myself!  I had fun!!!

RLW